Introduction:
Azure Functions is a solution for easily running small pieces of code in the cloud. We can create, execute, and test our custom logic function without creating a VM or web applications and also without needing to install any software or infrastructure to run the function. In this article, you will learn about create and test azure functions using azure Portal.
Steps to Create Azure Functions:
Step 1
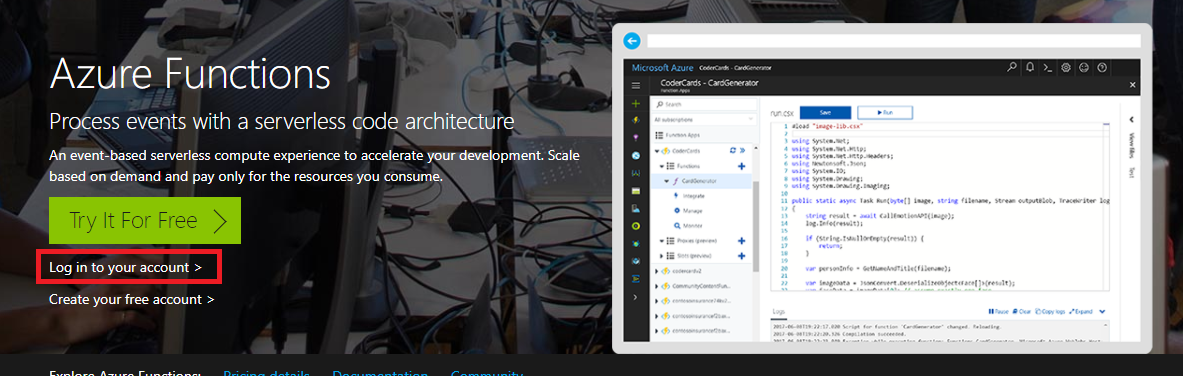
Navigate to https://functions.azure.com and click on “Login in to your account".
Step 2:
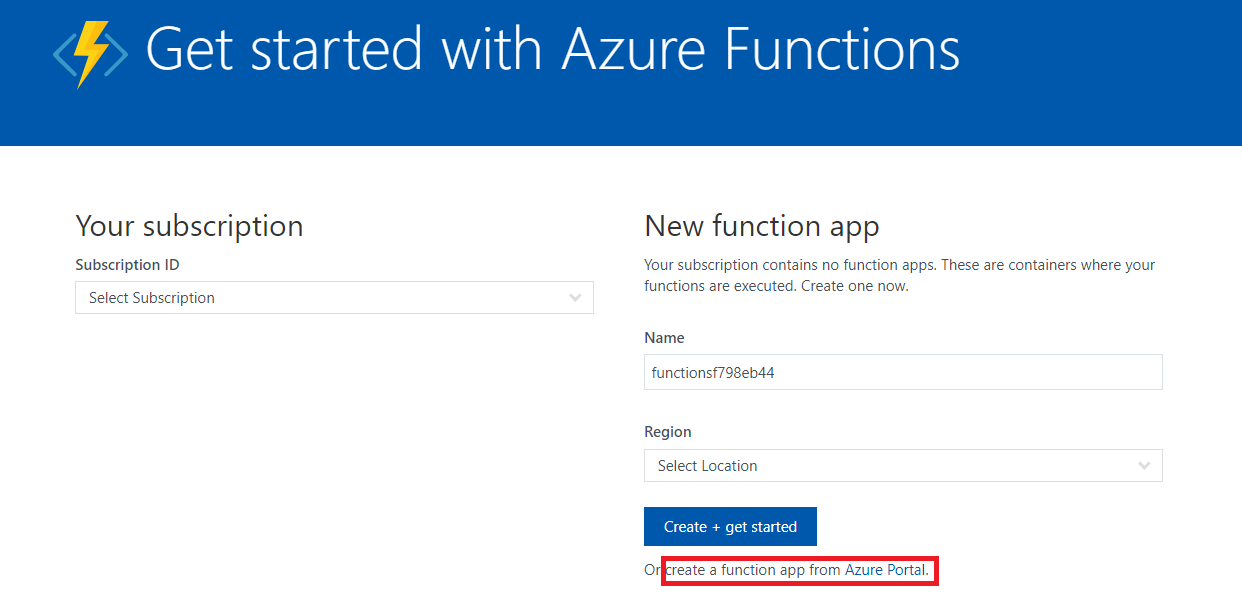
We should be following two ways to create Azure Functions
- Navigate to https://functions.azure.com and Provide Azure Functions details and create the Azure Functions.
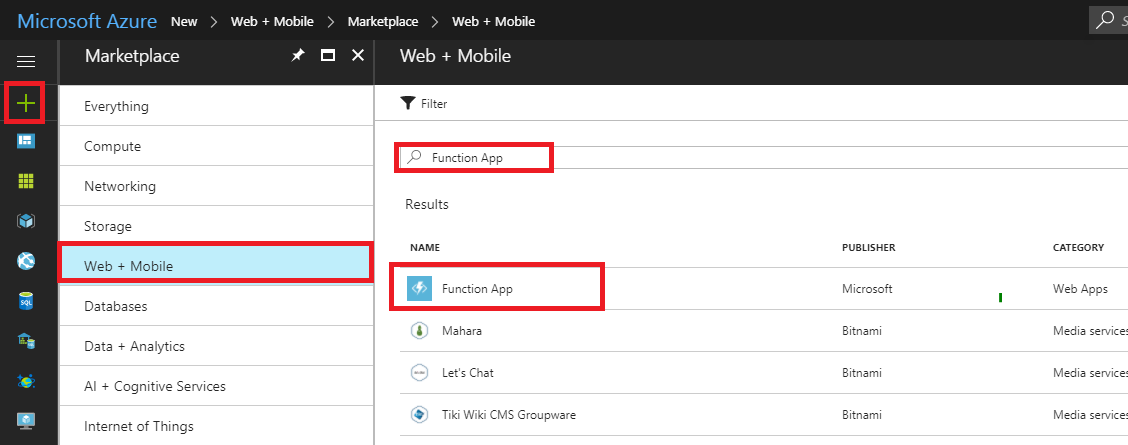
- Navigate to https://portal.azure.com , Click on New from Azure portal > Web + Mobile >Click on see All or Search > Function App
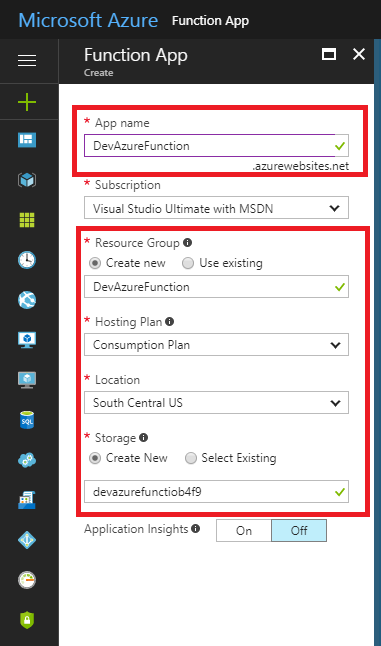
Step 3: Create Azure Functions App:
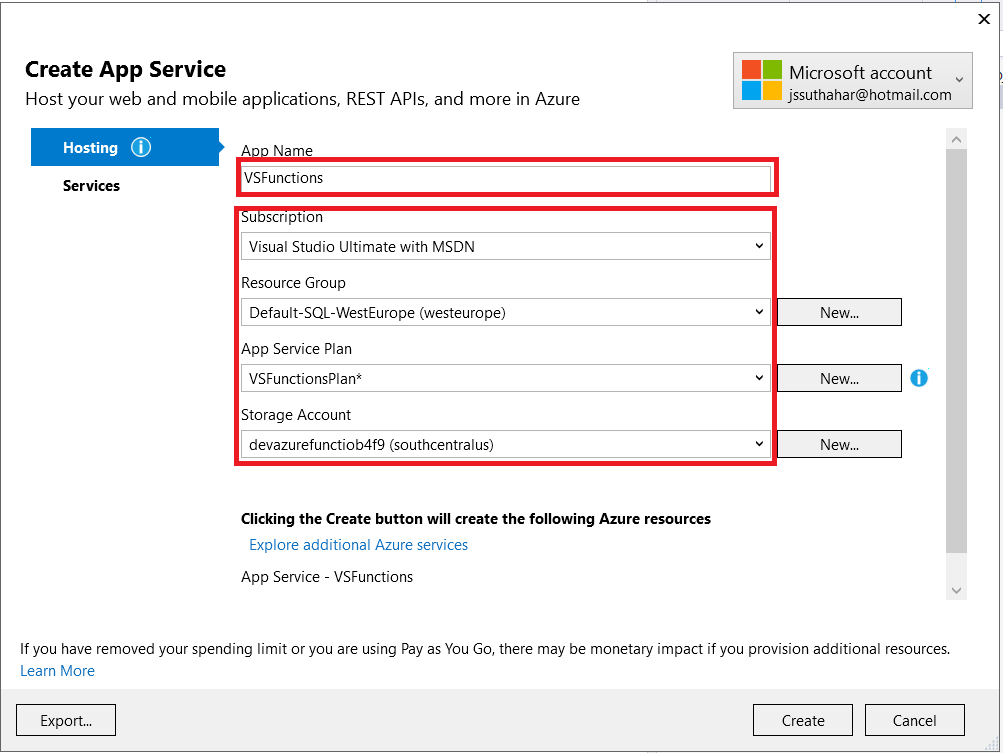
Provide the functions App Name and following details for create new functions
- App Name – Provide your Unique functions name
- Subscriptions – Select your subscription Free or any type
- Resource Group -create or select existing resource group name.
- Hosting Plan – You can Select default hosting plan as consumption plan, you have to pay only for the time functions code runs.
- Location – Select Your nearest location (eg. South Central US).
- Storage Account – You can Select or existing storage account.
Step 4:
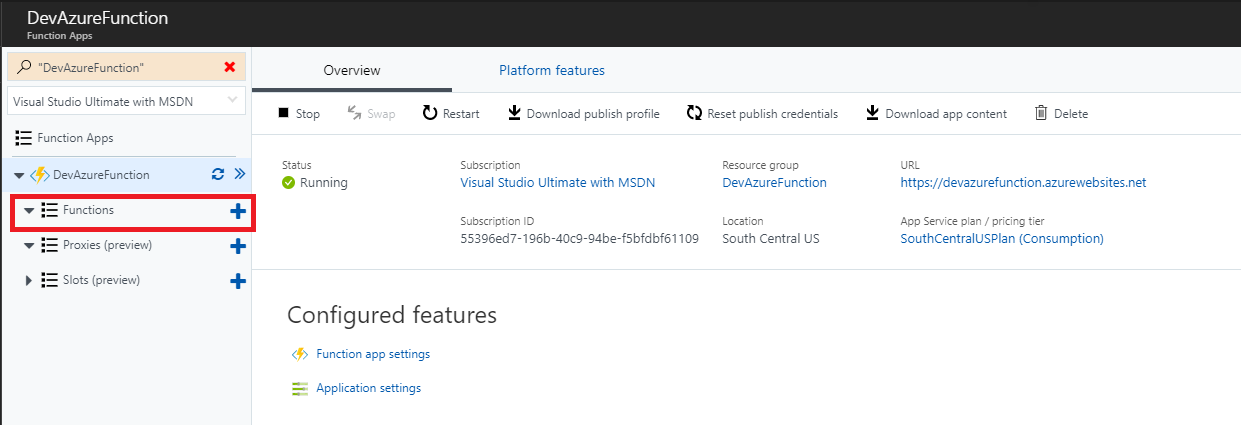
Click on create and wait for a few minutes to deploy the new Azure Function app. Expand your new function app and click the + button next to Functions.
Step 5:
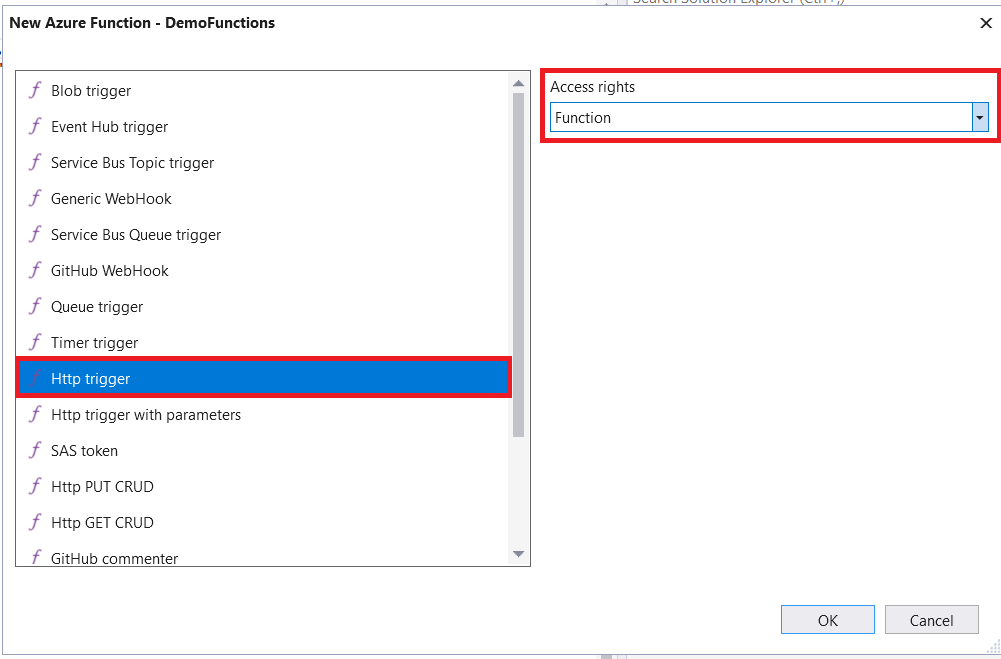
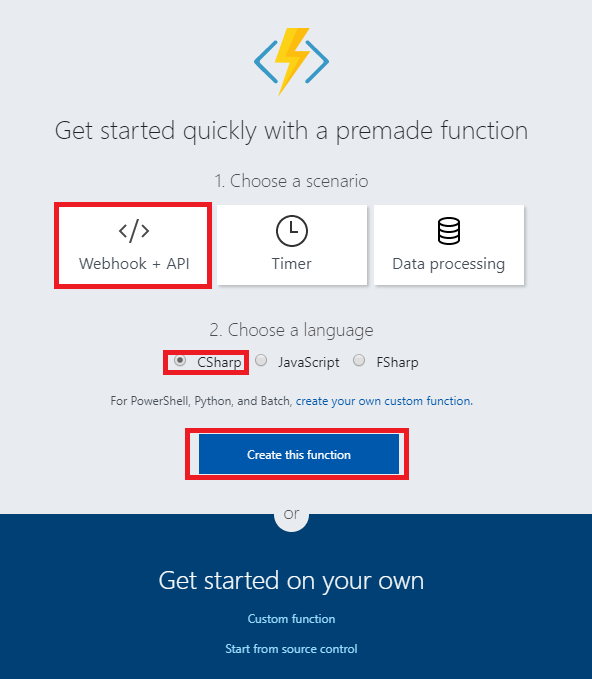
After clicking on + button, you will get the following screen, select WebHook + API, choose a language for your function, and click on Create this function.
Step 6: Azure Functions Editor
The .csx file format allows you to write a C# function. Include any assembly references and namespaces at the beginning of the file as usual in C# and write your logic in Run method, just like below.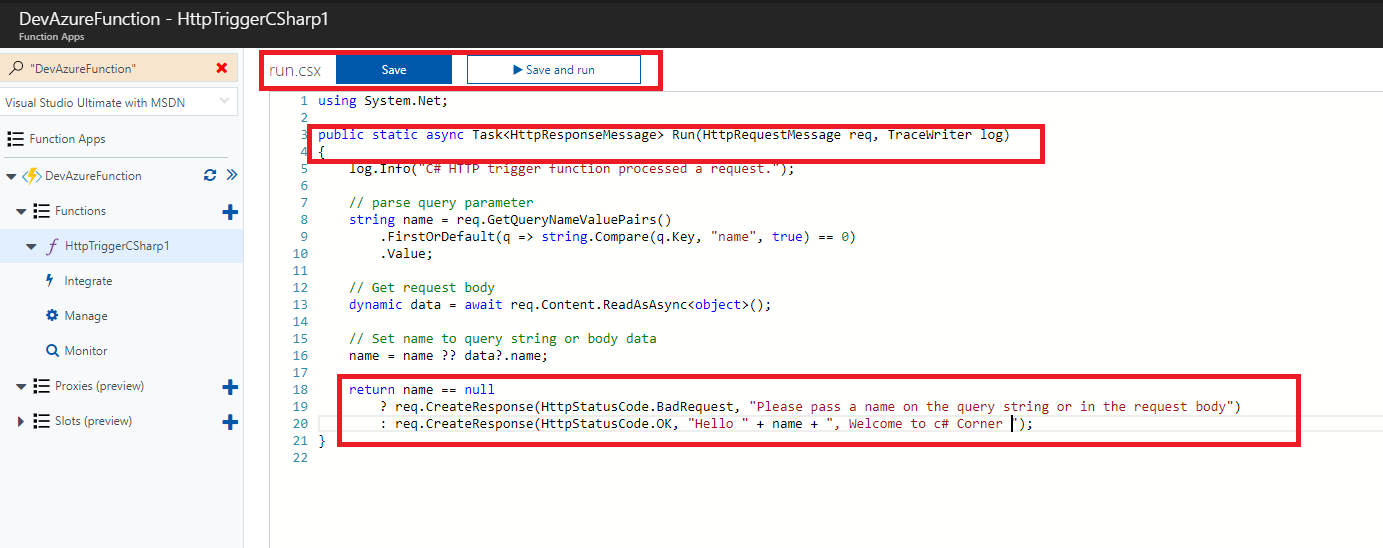
Step 7:
Run and Test Azure Functions:
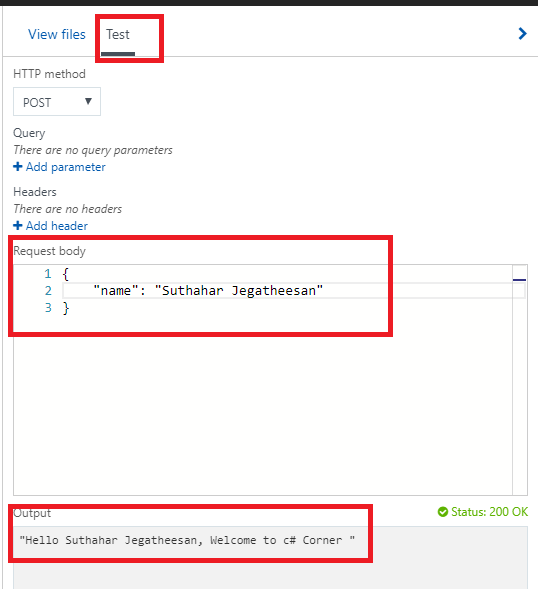
You can provide JSON string like the following in the request body and Click on the Run button for test the Azure Functions
Testing in Web Browser:
The web browser is a simple way to trigger functions via HTTP. You can use a browser for GET requests that do not require a body payload, and that use only query string parameters.
To test the function we defined earlier, copy the Function Url from the Azure function portal like below
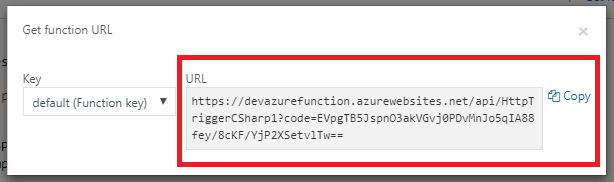
Append the name parameter to the query string. Use an actual name for the <Enter a name here> placeholder.
https://<Your Function App>.azurewebsites.net/api/<Your Function Name>?code=<your access code>&name=<Enter a name here>, Paste the URL into your browser, and you should get a response similar to the following.

Related Article:
Summary:
In this article, you learned about Azure Functions, how to create and test Azure Functions in Azure Portal.
If you have any questions/ feedback/ issues, please write in the comment box.